Golf buggy motor and controller upgrades explained
Written by the Hawke Electric Vehicles Service Team
Quick answer
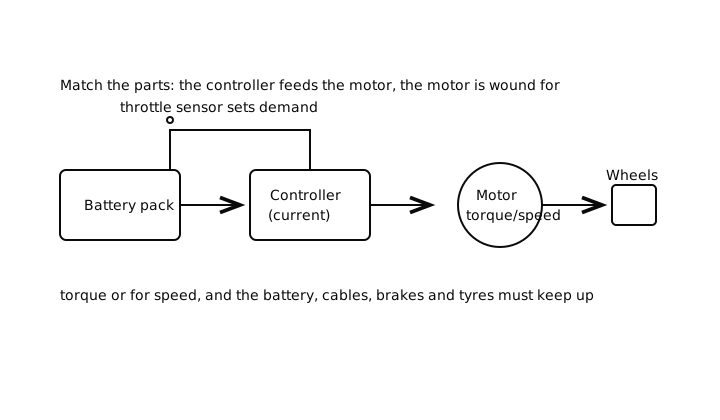
A motor upgrade changes how much torque or top speed a golf buggy makes, and a controller upgrade raises the current the system can deliver, so the two are usually matched as a pair. Decide first whether you want more hill-climbing torque or more top speed, because the two pull in different directions, then make sure the batteries, cables, brakes and tyres can cope with the extra performance. Have the controller programmed to suit the parts and check your local rules on speed before you start.
Tools needed
- Digital multimeter
- Insulated spanners
- Safety glasses
- Cable crimping tool
- Torque wrench
- Programmer or dealer programming
Parts needed
- Upgraded motor rated for torque or speed
- Matched controller of the correct voltage and current rating
- Heavier-gauge cables where current rises
- Uprated brakes or tyres if needed
- Throttle sensor to suit the new controller
What this improves
This overview covers the common drive upgrades so you can plan a sensible package rather than buying parts that fight each other. A motor and controller upgrade is chosen for more torque to climb hills or carry loads, or for more top speed on the flat. It does not fix a fault: if the buggy has simply gone slow, work through the running slow guide first, because a tired battery, a dragging brake or a failing motor will not be cured by fitting a bigger controller.
Tools and parts
Parts
- An upgraded motor, wound either for torque or for speed, to match your goal
- A matched controller of the correct pack voltage and a higher current rating
- Heavier-gauge cables and lugs where the current rises
- Uprated brakes and suitable tyres if top speed increases
- A throttle sensor compatible with the new controller
You will need a digital multimeter, insulated spanners, a crimping tool, a torque wrench and eye protection, plus a way to program the controller, either a handheld programmer or a dealer. This is an advanced job. The parts are not hard to bolt on, but choosing a matched set and programming it correctly is what makes the difference between a reliable upgrade and one that trips into limp mode or cooks itself.
How to approach it
1Decide torque or speed first
Settle on your goal before buying anything. A torque-wound motor pulls harder on hills but tops out lower; a speed-wound motor runs faster on the flat but climbs less well. You cannot have the maximum of both from one motor.
ExpectedA single clear aim, either more torque or more top speed, that every part is then chosen to serve
2Match the controller to the motor and pack
Choose a controller of the correct nominal pack voltage with a current rating that suits the motor. The controller and motor are a pair, so buy them as a matched set or on the supplier's compatibility guidance rather than mixing at random.
ExpectedA controller and motor confirmed as compatible for your pack voltage, with a current rating the motor can use
3Check the supporting systems can cope
Confirm the batteries can supply the extra current, uprate the cables where current rises, and make sure the brakes and tyres suit the new performance. A faster buggy needs to stop and steer as well as it goes.
ExpectedBatteries, cables, brakes and tyres all rated for the intended performance, with anything marginal upgraded
4Fit the parts and program the controller
Install the motor, controller, cables and throttle sensor as the instructions specify, torque the power connections, then program the controller to suit the motor and your settings. Programming sets current limits and speed, so it is central to a safe result.
ExpectedEverything fitted and torqued, and a controller programmed to matched settings with no fault codes on power-up
Check it worked
5Test gently and watch temperatures
Drive gently at first, then build up, checking the motor and controller do not run unusually hot and that the buggy stops and steers safely at the new speed. Recheck the power connections for heat after the first proper run.
ExpectedSteady performance, connections that stay cool, no limp mode or fault code, and safe braking and steering at speed
When to book an engineer
Book an engineer if you are not confident sizing a matched motor and controller, programming the controller, or judging whether the brakes and tyres suit the new speed. The wrong combination can trip into limp mode, overheat, or leave a faster buggy that cannot stop safely. An engineer can also advise on the legal position of raising speed where you drive, which is worth knowing before you spend.
Common questions
Do I have to upgrade the motor and controller together?
Usually yes. The controller sets the current the motor receives, so a bigger motor needs a controller that can feed it, and a bigger controller does little behind a standard motor. Matching the two as a set, and programming the controller to suit, is what gives a reliable result.
Can I have more torque and more top speed?
Not fully from one motor. A torque-wound motor climbs better but tops out lower, and a speed-wound motor runs faster but pulls less on hills. Decide which matters more for how you use the buggy, and choose the motor for that, because trying to maximise both leaves you with neither.
Will an upgrade drain the battery faster?
More performance draws more current, so range can fall, especially with a speed setup driven hard. Make sure the batteries can supply the current comfortably, and expect to balance speed against range. This is one reason some owners pair a performance upgrade with a lithium conversion.
Is it legal to make my buggy faster?
That depends entirely on where and how you use it. Raising the speed of a vehicle used on any public land can have legal and insurance consequences, so check the rules that apply to you before upgrading. On private land the constraint is safety: the brakes, tyres and steering must suit the speed.
Why did my buggy go into limp mode after an upgrade?
Limp mode usually follows a mismatch or a programming error: a controller current limit set wrong, an incompatible throttle sensor, or a motor and controller that do not suit each other. Recheck the parts are matched and the controller is programmed correctly, and read the fault code the controller reports rather than guessing.
Did this fix it?
Every guide is written from manufacturer service documentation and workshop practice, then reviewed before publication. Read how we write and review our repair guides.