How to convert a golf buggy to lithium
Written by the Hawke Electric Vehicles Service Team
Quick answer
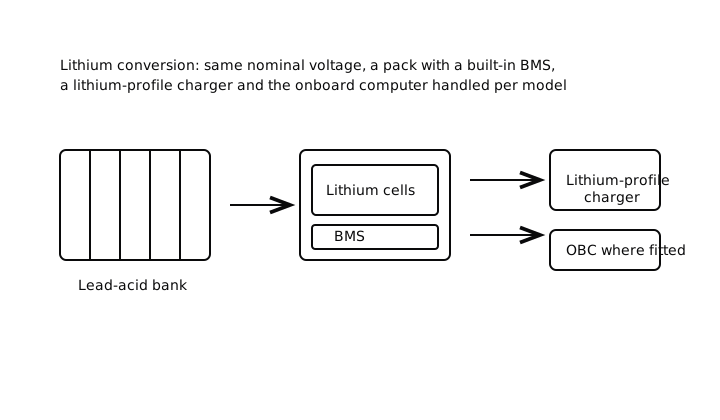
Converting a golf buggy to lithium means swapping the bank of lead-acid batteries for a lithium pack of the same nominal voltage, fitted with a battery management system, then making the charger, the wiring and any onboard computer work with it. It is a moderate to advanced job because the pack voltage must match, the charger must have a lithium profile, and on Club Car models with an onboard computer the charging circuit needs addressing. Read the kit instructions and your buggy manual, and hand the electrical integration to an engineer if you are unsure.
Tools needed
- Digital multimeter
- Insulated spanners
- Safety glasses
- Insulated gloves
- Battery lifting strap
- Cable crimping tool
- Torque wrench
Parts needed
- Lithium pack matched to the nominal pack voltage
- Battery management system, usually built into the pack
- Lithium-profile charger or a compatible existing charger
- Mounting tray, brackets or spacers
- Correct-gauge cables and lugs
What this fixes
This overview explains what a lithium conversion involves so you can decide whether to attempt it and what to prepare. Owners convert to lithium for lighter weight, a longer usable range from the same charge, faster charging, and freedom from watering and from the gradual capacity loss of an ageing lead-acid bank. It is not a repair for a specific fault; it is an upgrade. If your buggy has simply lost range on tired lead-acid batteries, test the pack first with the battery voltage test guide, because a single weak battery can be replaced far more cheaply than a full conversion.
Tools and parts
Parts
- Lithium pack matched to the nominal pack voltage, commonly 36V or 48V
- Battery management system, normally integrated in the pack
- A charger with a lithium profile, or confirmation that the existing charger is compatible
- Mounting tray, brackets or spacers to locate a smaller, lighter pack
- Correct-gauge cables and lugs where the layout changes
You will need a digital multimeter, insulated spanners, a crimping tool, a torque wrench, eye protection and insulated gloves. This is an advanced job, not because any one step is hard, but because the pack voltage, the charger and the onboard computer all have to agree. Set aside a few hours, and more if the charger or the Club Car onboard computer needs attention. A ready-made kit for your model removes much of the guesswork and is worth choosing over loose parts.
How to do it
1Confirm the pack voltage and the layout
Read the nominal voltage of the existing pack from the batteries and the wiring, for example six 6V batteries in series make a 36V pack and six 8V or four 12V batteries make a 48V pack. The lithium pack must match that nominal voltage.
ExpectedA clear figure, commonly 36V or 48V, that the replacement lithium pack is specified to match
2Isolate and remove the lead-acid bank
With the key off and the Tow/Run switch on Tow, disconnect the main negative first, then the positive, then the interconnecting links, and lift the batteries out with a strap. Note the routing of every cable before you disturb it.
ExpectedThe old bank removed, the tray empty, and a photograph or note of the original wiring
3Mount the lithium pack securely
Fit the pack in the tray using the kit brackets or spacers so it cannot move, because a lithium pack is lighter and will slide in a tray sized for lead-acid. Keep it clear of heat and away from the wheels and suspension travel.
ExpectedA pack held firmly with no movement, its terminals accessible and its vents or connectors unobstructed
4Wire the pack and the management system
Connect the main cables to the correct polarity and route any battery management system leads exactly as the kit specifies. Do not omit or bypass the management system, because it protects the cells from over-discharge, overcharge and imbalance.
ExpectedCorrect polarity confirmed with a multimeter and every management-system connection made as the instructions show
5Sort the charger and any onboard computer
Fit or confirm a charger with a lithium profile. On Club Car models with an onboard computer, the charging path runs through that computer, so follow the kit guidance for that model rather than assuming the old charger will simply work.
ExpectedA charger that delivers a lithium charge profile and a charging circuit that suits the model, verified against the kit instructions
Check it worked
6Power up, drive and charge under supervision
Reconnect, switch the Tow/Run switch to Run, and check the buggy powers up and drives normally. Then charge it while you watch, and confirm the pack takes charge and stops correctly.
ExpectedNormal drive, a full charge that completes and stops, and no fault indication from the management system or the charger
When to book an engineer
Book an engineer for the electrical integration if you are not fully confident: matching the charger, addressing the Club Car onboard computer, sizing cables, and confirming the management system is wired correctly are the parts that go wrong. Getting any of these wrong can damage the pack or leave the buggy unreliable, and a lithium pack is a considerable outlay to risk. An engineer can also advise whether your model is a straightforward candidate before you buy the kit.
Common questions
Will a lithium pack fit straight into my buggy?
The nominal voltage must match, so a 36V buggy needs a 36V lithium pack and a 48V buggy a 48V pack. Physically a lithium pack is lighter and smaller, so it usually needs brackets or spacers to sit securely in a tray built for lead-acid. A kit made for your model takes care of the fit.
Do I need a new charger for lithium?
You need a charger that delivers a lithium charge profile, because a lead-acid profile can over or undercharge lithium cells. Some kits include a charger, some confirm an existing charger is suitable, and on Club Car models with an onboard computer the charging path needs handling for that model. Do not assume the old charger simply works.
What is the battery management system for?
The battery management system protects the lithium cells by preventing over-discharge, overcharge and cell imbalance, and it is normally built into the pack. It is essential to safe operation, so it must be wired as the instructions show and never bypassed or modified. If it reports a fault, stop and investigate rather than overriding it.
Is a lithium conversion worth it?
It depends on your use. Lithium gives lighter weight, more usable range per charge, faster charging and no watering, but it is a significant outlay. If your only problem is a tired lead-acid bank, testing and replacing a weak battery is far cheaper. If you want the range and low maintenance long term, a conversion can make sense.
Can I do the conversion myself?
The mechanical swap is within reach of a confident owner, but the electrical integration, the charger and the Club Car onboard computer are where conversions go wrong. If any of that is beyond your confidence, do the removal and mounting yourself and have an engineer complete and verify the electrical side.
Did this fix it?
Every guide is written from manufacturer service documentation and workshop practice, then reviewed before publication. Read how we write and review our repair guides.