Golf buggy pre-season checklist: get it ready
Written by the Hawke Electric Vehicles Service Team
Quick answer
A pre-season check goes through the batteries, tyres, brakes, steering and lights so the buggy starts the season safe and reliable. It takes an hour or so, needs only basic tools, and catches the small faults, a low cell, soft tyres, a dragging brake, before they leave you stranded or become a bigger repair. Do the safety items, brakes and steering, carefully.
Tools needed
- Multimeter
- Tyre pressure gauge
- Torque wrench
- Distilled water and filler
- Cleaning kit
Parts needed
- Distilled water for battery top-up
- Terminal protector or grease
What this covers
This check gets a buggy ready after a quiet spell or the winter, so it is safe and reliable for the season ahead. It is not a full workshop service, but it catches the common faults that leave owners stranded or turn into bigger bills: a weak battery cell, soft or worn tyres, brakes out of adjustment, play in the steering and dead lights. It applies to electric and petrol buggies, with a note on fuel and oil for petrol.
Tools and parts
Parts
- Distilled water to top up lead-acid cells
- Terminal protector or grease
- Correct fuse spares in case any are blown
You will also want a multimeter, a tyre pressure gauge, a torque wrench and basic cleaning kit. This is a low-difficulty job of an hour or two, but take the brake and steering checks seriously because they are the safety items.
How to do it
1Clean and inspect the buggy
Wash off the winter grime, then look over the buggy for damage, loose fittings, leaks and anything obviously out of place.
ExpectedA clean buggy with no obvious damage or loose parts; anything you find here is easier to sort now than mid-season
2Check and top up the batteries
On lead-acid packs, check the electrolyte covers the plates in every cell and top up with distilled water where needed, then clean and protect the terminals.
ExpectedEvery cell covered and topped to the correct level, terminals clean, tight and protected
3Charge the pack and check its health
Fully charge the pack, then measure it rested and, ideally, each battery, following the battery testing guide.
ExpectedA full rested pack near 38.2 V on a 36 V system or 50.9 V on a 48 V system, with no single battery a volt or more below its siblings
4Check the tyres
Set every tyre to the pressure on the sidewall or in the handbook, and inspect for uneven wear, cracking, bulges and damage.
ExpectedAll tyres at the correct even pressure with plenty of tread and no damage; replace any tyre that is worn out or cracked
5Check the wheel nuts
Check each wheel nut and torque them evenly in a criss-cross pattern to the figure in your handbook.
ExpectedAll wheel nuts tight and even at the correct torque, with no loose or damaged nuts or studs
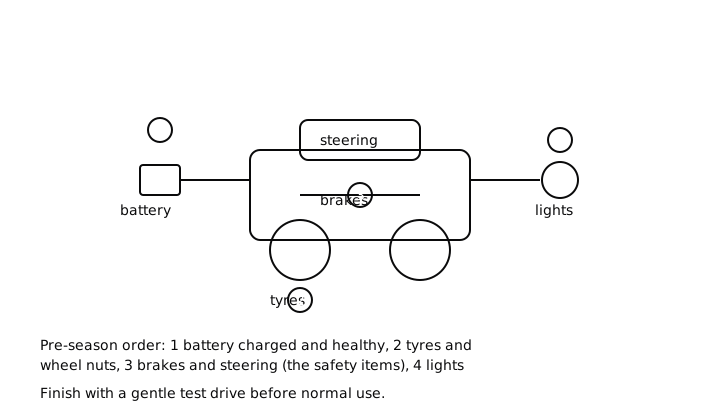
6Test and adjust the brakes
Test the brakes at low speed in a clear space, then, if they feel weak or uneven, adjust them following the drum brake procedure and confirm the parking brake holds on a slope.
ExpectedBrakes that stop the buggy straight and evenly, and a parking brake that holds on a gentle slope; adjust or investigate anything less
7Check the steering
With the buggy safely raised, check for play in the tie rod ends and kingpins and that the buggy tracks straight, following the steering wander guide.
ExpectedTight steering joints and a buggy that holds a straight line; play or wander needs attention before the season
8Test the lights and accessories
Switch on the headlights, tail lights, indicators, horn and any other accessories and confirm each works, and check the fuses if any are dead.
ExpectedEvery light and accessory working; a dead item points to a bulb, fuse, earth or, if all 12 volt items are dead, the voltage reducer
9Petrol buggies: check fuel and oil
On a petrol buggy, confirm the fuel is fresh, check the engine oil level and condition, and check the air filter, following the handbook intervals.
ExpectedFresh fuel, oil at the correct level and in good condition, and a clean air filter; stale fuel or dirty oil should be renewed
Check it is ready
10Take a gentle test drive
Once everything checks out, take a careful drive in a clear space, listening and feeling for anything unusual in the drive, brakes, steering and ride.
ExpectedSmooth, quiet running, straight tracking, even braking and no warning beeps or lights; investigate anything that stands out before normal use
When to book an engineer
Book an engineer if the pack will not hold charge or a battery is failing, if the brakes or parking brake will not adjust to hold properly, if you find play in the steering, or if a petrol buggy will not run cleanly on fresh fuel. The brakes and steering are safety items, so if a check raises a doubt you cannot resolve, it is worth a professional look before you rely on the buggy for the season.
Common questions
How often should I run a full check on my buggy?
A thorough check at the start of the season, plus a quick monthly look at the batteries, tyres and brakes, keeps most buggies reliable. If you use the buggy hard or all year, check it more often. The aim is to catch small faults, a low cell or a dragging brake, before they leave you stranded or grow into a bigger repair.
What is the most important pre-season check?
The brakes and steering, because they are the safety items, and the batteries, because a weak pack is the most common reason a buggy lets you down. Make sure the brakes stop the buggy straight, the parking brake holds, the steering has no play, and the pack charges and holds a healthy voltage.
Can I do a pre-season check myself?
Yes, most of it is within reach of a careful owner with basic tools: cleaning, battery top-up and charging, tyre pressures, wheel nuts and testing the lights. Take the brake and steering checks seriously and, if adjusting them is beyond your comfort, have those safety items done by an engineer.
How do I know if a battery is failing before the season?
Fully charge the pack, let it rest, then measure each battery. A healthy 6 V battery reads 6.3 to 6.4 V rested, an 8 V reads 8.4 to 8.5 V and a 12 V reads 12.6 to 12.7 V. A single battery a volt or more below the others, or a pack that will not hold its charge, is a sign a battery is failing and should be tested properly.
Did this fix it?
Every guide is written from manufacturer service documentation and workshop practice, then reviewed before publication. Read how we write and review our repair guides.