How to replace golf cart seat covers
Written by the Hawke Electric Vehicles Service Team
Quick answer
Replacing golf cart seat covers means lifting out the seat bottom and back, stripping the old covers, fitting the new ones over sound foam, and reinstalling the seats. It is an easy to moderate job of about one to two hours, and the main choice is whether to fit slip-on covers, staple or clip new covers over the existing foam, or replace the whole seat assembly if the foam or base has broken down. Buy covers listed for your model so the shape and fasteners match.
Tools needed
- Socket set or wrenches
- Screwdriver
- Staple gun and staples
- Trim clip tool or pliers
- Marker pen
Parts needed
- Replacement seat covers or a complete seat assembly for your model
- New foam if the old foam is broken down
- New mounting bolts or clips if worn
What this fixes
This procedure recovers or replaces a seat that is split, cracked, faded, stained or torn, on either the seat bottom or the backrest. It covers three routes: slip-on covers that pull over the existing seat, replacement covers that staple or clip over the foam, and a complete replacement seat where the foam or base has broken down. It does not cover a broken seat frame or hinge, which is a structural repair, and recovering will not save a seat whose foam has collapsed, where new foam or a full seat is the honest answer.
Tools and parts
Parts
- Replacement seat covers, or a complete seat assembly, listed for your model
- New seat foam, only if the existing foam is broken down or damp
- New mounting bolts or clips if the old fasteners are worn
Gather a socket set or wrenches, a screwdriver, and, depending on the cover type, a staple gun with staples or a trim clip tool. A marker helps you note the order of parts. This is an easy job for slip-on covers and a moderate one where covers staple over the foam. Buy covers made for your model so the shape, seams and mounting points line up.
How to do it
1Assess the foam and base first
Press the seat foam. If it springs back and the base is solid, recovering is worthwhile. If the foam is crumbling, permanently flattened or damp, or the base is cracked, plan to replace the foam or the whole seat, because a new cover over dead foam will not last or sit right.
ExpectedA clear decision: sound foam to recover, or collapsed foam or a broken base that needs replacing
2Remove the seat bottom and back
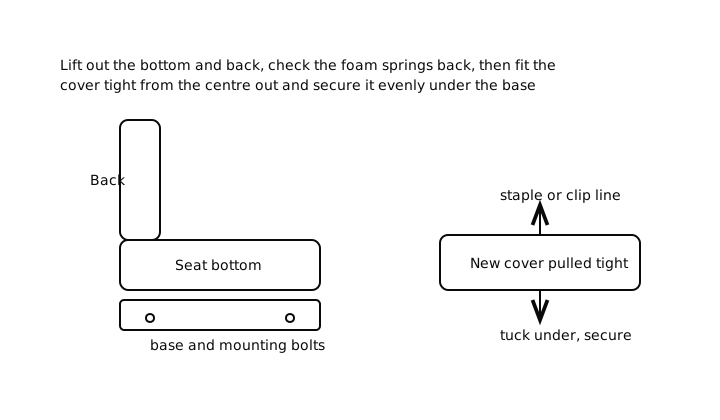
Back out the bolts or release the clips holding the seat bottom, then the backrest, and lift them out. Keep the fasteners together and note which bolt came from where. Take care around the battery bay under the seat bottom.
ExpectedBoth seat sections removed, fasteners kept together, and the battery bay left undisturbed
3Strip the old covers
For a stapled cover, pry out the staples around the underside and peel the cover off. For a clipped cover, release the trim clips. For slip-on covers there is nothing to strip. Keep the old cover to compare the fit of the new one.
ExpectedThe old cover off with the foam intact, and the staple or clip line clear for the new cover
4Fit the new cover evenly
Center the new cover, pull it tight and even from the middle outward to avoid wrinkles, and secure it with staples or clips working side to side, or simply slip a slip-on cover into place. Tuck the corners neatly.
ExpectedA tight, wrinkle-free cover secured evenly all around, with the seams sitting straight
Check it worked
5Reinstall the seats and check they are secure
Bolt or clip the seat bottom and backrest back in, in the reverse order, and tighten the fasteners. Sit on the seat and give it a firm push to confirm it is solid and does not shift.
ExpectedA neatly covered seat, bolted back securely, that does not move when pushed or sat on
When to get professional help
Seat work rarely needs a technician, but call one if the seat frame, hinge or mounting points are cracked or corroded, because that is a structural repair rather than trim work. It is also worth having the battery bay checked at the same time if the old seat let water in, since a seat that leaks onto the batteries can cause corrosion and electrical faults that matter more than the seat itself.
Common questions
Can I recover a seat or do I need a whole new one?
If the foam springs back and the base is solid, new covers are worthwhile and cheaper. If the foam is crumbling, flattened or damp, or the base is cracked, replace the foam or fit a complete seat, because a cover over dead foam will neither sit right nor last. Press the foam to decide.
How are golf cart seat covers held on?
It varies by model. Some are slip-on covers that pull over the seat, some staple to the underside of the foam base, and some use trim clips. Check how your existing cover is held before you buy, so you get the matching type and the right tool, whether that is a staple gun or a clip tool.
What is under the seat bottom on my cart?
On many carts the seat bottom sits directly above the battery bay, so lifting it exposes the batteries and their terminals. Keep tools and metal away from the terminals while the seat is out, and if the old seat has been letting water in, check the batteries and connections for corrosion before you reinstall.
Will the covers be waterproof?
Marine-grade vinyl covers made for carts shed rain and resist fading, but the seams and the joints around the seat are where water gets in over time. Fit the covers tightly, keep the seams straight, and if your cart lives outside, a cover over the whole seat when parked extends their life.
Did this fix it?
Every guide is written from manufacturer service documentation and workshop practice, then reviewed before publication. Read how we write and review our repair guides.